Background
This guide will show how to provide authentication and authorization to Minikube with kubectl. Although this guide is using Minikube, it should be fairly straight-forward to use this methodology with any self-hosted Kubernetes clusters.
NOTE: cloud providers usually provide their own methods for authentication and authorization when using a PaaS offering such as AKS, GKE, EKS etc.
The following will be covered:
- Create and configure OIDC Server and Client apps in Azure AD
- Start Minikube with the appropriate flags for the apiserver
- Create kubectl config for authentication
- Authorize a user and group in the cluster
Setup
You will need the following installed:
Create and Configure OIDC Server and Client apps in Azure AD
We will be creating two app registrations in Azure AD. The AADServer app is providing the authentication endpoint, and the AADClient app is what kubectl will use to authenticate with.
Server App
Go to Azure AD > App registrations
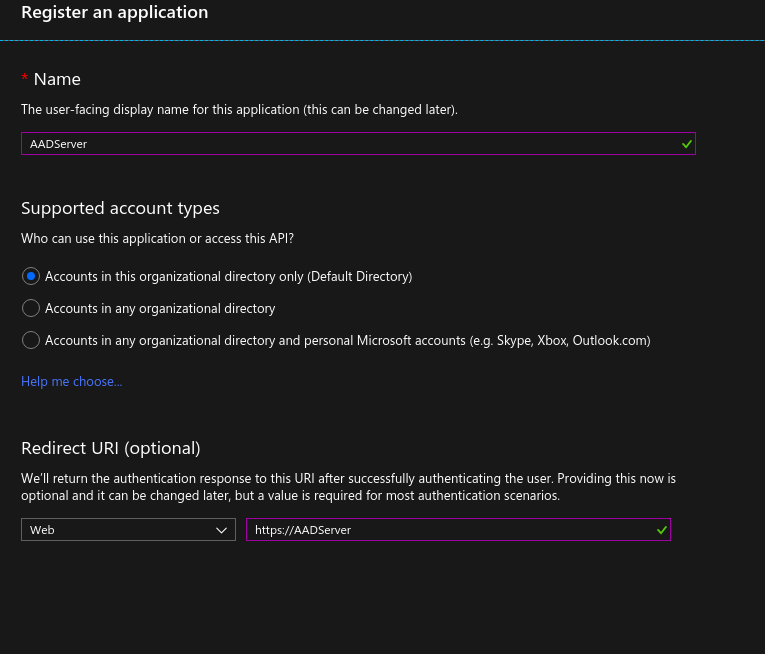
From there create a new application called AADServer and just pick any Redirect URI (it doesn’t matter what it is, but it seems like it does need to be there).
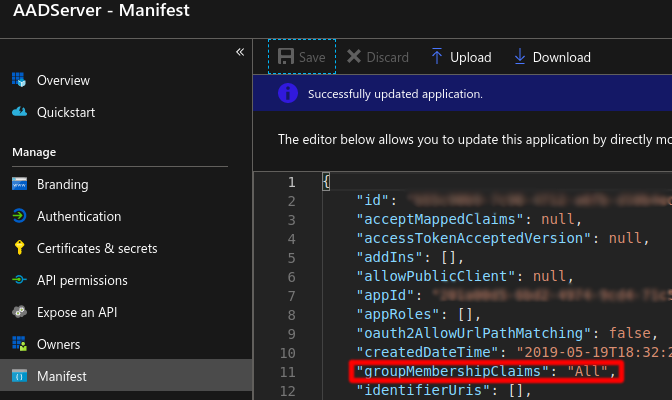
Then, go to Manifest, and adjust groupMembershipClaims to “All”
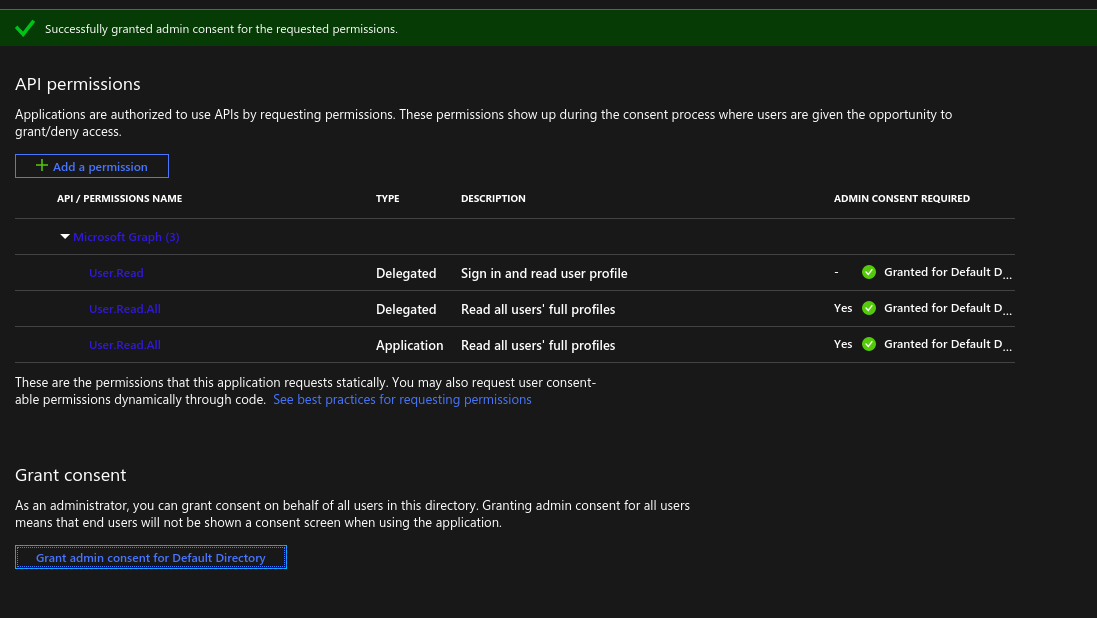
Now we need to add API permissions. On the left navigation, select API Permissions. Click “Add a permission” and select the following:
- Microsoft Graph > Application Permissions > User > User.Read.All
- Microsoft Graph > Delegated Permissions > User > User.Read.All
- Microsoft Graph > Delegated Permissions > User > User.Read
Click Grant admin consent for Default Directory
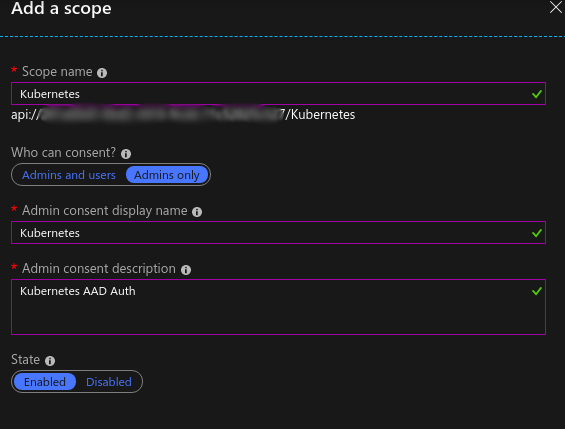
On the left navigation menu, select expose an API. Click add a scope, and click “Save and continue” for the auto-generated Application ID URI. Create whatever details you want for the scope and save.
Client App
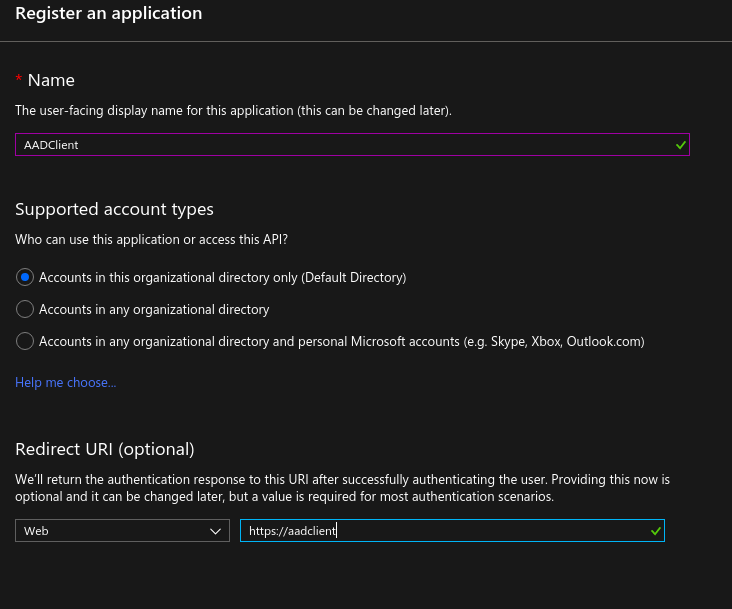
Now we will create another app registration called AADClient.
Go to Azure AD > App registrations
From there create a new application called AADClient and just pick any Redirect URI (it doesn’t matter what it is, but it seems like it does need to be there).
To set permissions, go to the navigation menu on the left and select API Permissions. Choose My API’s > AADServer > Delegated permissions > Kubernetes
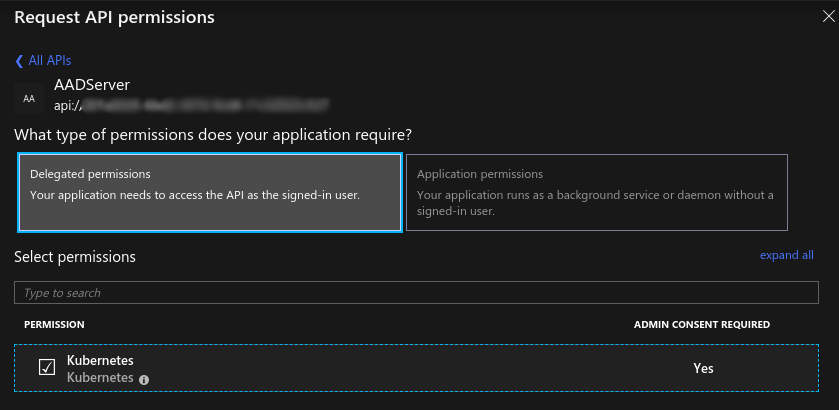
Click Grant admin consent to Default Directory

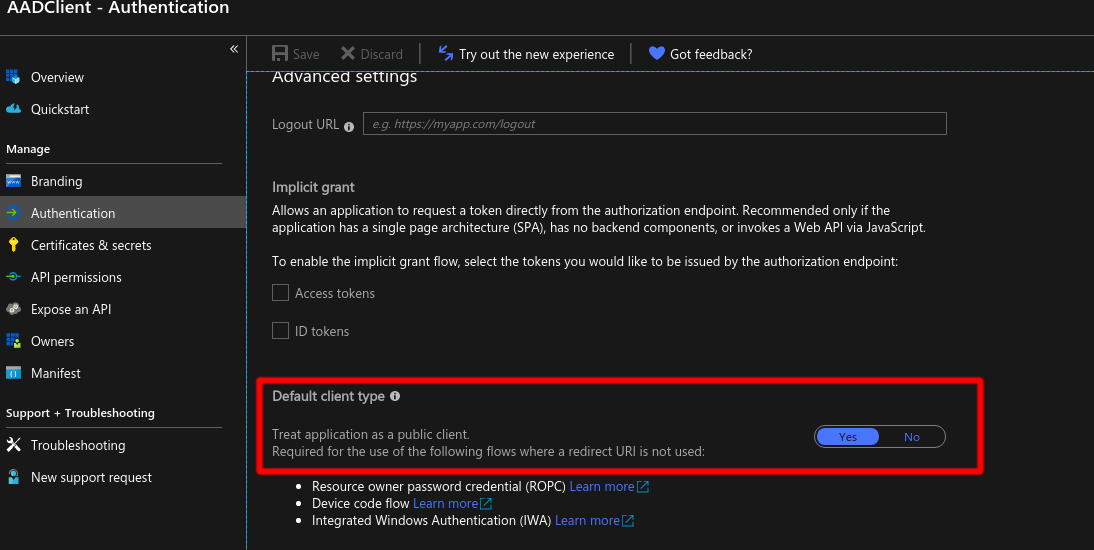
On navigation menu on the left, select Authentication. Change the Default client type to be a public client.
Start Minikube with API Server Flags
To start Minikube, we will need two pieces of information from the AADServer app registration. Go to Azure AD > App registrations > AADServer > Overview
From here get the application (client) ID and the Directory (tenant) ID.
With that information, replace the values in the following command to start Minikube (values denoted with two curly brackets {{value here}}):
minikube start \
--extra-config=apiserver.oidc-client-id="spn:{{AADServer application ID}}" \
--extra-config=apiserver.oidc-issuer-url="https://sts.windows.net/{{Directory (tenant) ID}}/" \
--extra-config=apiserver.authorization-mode=RBAC \
--extra-config=apiserver.oidc-username-claim="oid" \
--extra-config=apiserver.oidc-groups-claim="groups"
I am using oid for the username claim, but you can choose another claim like spn or email if you prefer.
NOTE: You need these command line flags for Minikube, but this can be accomplished on a regular Kubernetes cluster by changing the API server manifest on the master node at:
/etc/kubernetes/manifests/kube-apiserver.yaml
Create kubectl config for authentication
Now we will create a kubectl config that will prompt us for our Azure AD credentials.
Just like the previous step, you will need the AADServer application ID and Tenant ID, and in addition we will need the AADClient application ID (values denoted with two curly brackets {{value here}}).
kubectl config set-credentials aaduser \
--auth-provider=azure \
--auth-provider-arg=environment=AzurePublicCloud \
--auth-provider-arg=client-id={{AADClient application ID}} \
--auth-provider-arg=tenant-id={{Directory (tenant) ID}} \
--auth-provider-arg=apiserver-id={{AADServer application ID}}

kubectl config set-context aaduser \
--cluster=minikube \
--namespace=default \
--user=aaduser
Authorize
At this point, you can switch to the new context you have created and try a command (this will prompt you with a link and a code to sign in to Azure AD):
kubectl config use-context aaduser
kubectl get pods --all-namespaces
Running this command will fail, and it should show an unauthorized message.
kubectl get pods --all-namespaces
Error from server (Forbidden): pods is forbidden: User "https://sts.windows.net/{{tenant id}}/#{{user id}}" cannot list resource "pods" in API group "" at the cluster scope
In order to run this command, we will need to create an authorization policy using the user referenced in the unauthorized message. Save the following as podreaderauth.yaml (values denoted with two curly brackets {{value here}}):
#!yaml
---

apiVersion: rbac.authorization.k8s.io/v1
kind: ClusterRoleBinding
metadata:
  name: aaduser
roleRef:
  apiGroup: rbac.authorization.k8s.io
  kind: ClusterRole
  name: pod-reader
subjects:
- apiGroup: rbac.authorization.k8s.io
  kind: User
  name: "https://sts.windows.net/{{tenant id}}/#{{user id}}"

---

apiVersion: rbac.authorization.k8s.io/v1
kind: ClusterRole
metadata:
  name: pod-reader
rules:
- apiGroups: [""] # "" indicates the core API group
  resources: ["pods"]
  verbs: ["get", "watch", "list"]
Switch your context back to minikube so you can apply the ClusterRole and ClusterRoleBinding:
kubectl config use-context minikube
kubectl apply -f podreaderauth.yaml
Switch your context back to aaduser and try again, this time you should be authorized to look at pods:
kubectl config use-context aaduser
kubectl get pods --all-namespaces

# This should fail since the user is not authorized:
kubectl get nodes
We can do the same thing to authorize a user, but based on a group ID. To do this, create a group in Azure AD, add the user to the group, and get the group Object ID. Create the following as nodereaderauth.yaml (values denoted with two curly brackets {{value here}}):
#!yaml
---

apiVersion: rbac.authorization.k8s.io/v1
kind: ClusterRoleBinding
metadata:
  name: nodereaders
roleRef:
  apiGroup: rbac.authorization.k8s.io
  kind: ClusterRole
  name: node-reader
subjects:
- apiGroup: rbac.authorization.k8s.io
  kind: Group
  name: "{{group object ID}}"

---

apiVersion: rbac.authorization.k8s.io/v1
kind: ClusterRole
metadata:
  name: node-reader
rules:
- apiGroups: [""] # "" indicates the core API group
  resources: ["nodes"]
  verbs: ["get", "watch", "list"]
After applying that config you will be able to view nodes!
Troubleshooting
One of the best ways to troubleshoot and view claims that are available in the OIDC process is to run:
kubectl config view
From there, you can copy the access-token value to https://jwt.io or to be more secure:
echo "access-token value here" | base64 -d | python -m json.tool
NOTE: This way has issues with the dots ‘.’ in the token. Just echo the data in between the .’s
Resources
This guide was created using parts of the following documents:
- https://docs.microsoft.com/en-us/azure/aks/azure-ad-integration
- https://medium.com/@olemarkus/using-azure-ad-to-authenticate-to-kubernetes-eb143d3cce10
Let me know if there are parts of the guide that can be improved!
